Correctly inserting your bobbin

One of the most common reasons for your sewing machine not stitching properly is that the bobbin has not been inserted correctly.  It’s a sneaky problem because when threading your sewing machine, and inserting the bobbin, it can look correct even when it is not.  Luckily it’s an easy problem to fix and I’m going to show you how to make sure your bobbin is alway inserted the correct way.

There are 2 ways that you can insert your bobbin into the casing of the sewing machine.  This applies to both top loading bobbins and machines with a separate bobbin case.  You can insert it the right way, or the wrong way!

If you don’t know which is the correct way to put your bobbin in to the case then you have a 50/50 chance of getting the bobbin the right way round. Sometimes your machine sews a beautiful stitch and sometimes it doesn’t.

The information below relates to every sewing machine I have ever threaded in my almost 40 years of sewing.  If your machine manual tells you differently for your particular model of machine, then you must use the manual instructions specific to your machine.

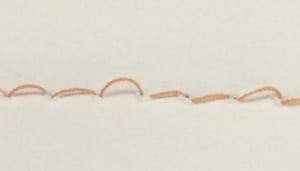
This picture shows you what the stitching may look like if your bobbin is the wrong way round.  You will probably only see this type of stitching on the underside.  Another sneaky problem, because if your top stitch looks fine, it may take a while to spot the problem.

The reason that the stitch is like this underneath is because the bobbin thread has lost it’s tension.  The tension loss is caused by the bobbin thread unwinding the wrong way.

bobbin thread
bobbin 5

CORRECT

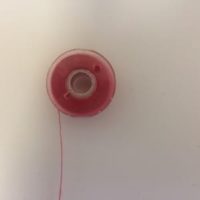
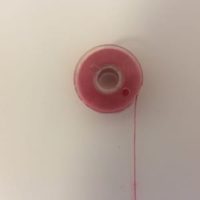
When you look at the bobbin from the top, the thread should hang down to the left hand side of the bobbin.  I think of it as the bobbin looking like the letter P.  This is the correct way to put the bobbin into the case.

bobbin 4

WRONG

When you look at the bobbin from the top, and the thread hangs down to the right hand side of the bobbin, it will look like the number 9.  This is the wrong way to put the bobbin into the case.

Getting the bobbin in the correct way up is the first step to making sure your machine is threaded correctly.

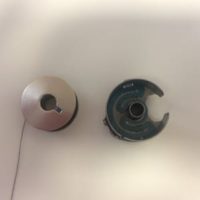
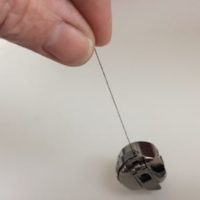
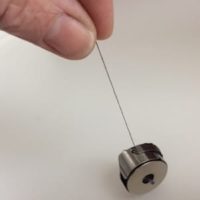
The  2 images on the right show you how the bobbin should look before being put into the bobbin case (front and top loading)

Next you need to make sure that the thread is positioned through the tension ‘groove’ firmly enough.  Your manual will show you this step. It is always worth checking you have completed this step correctly as you thread because even if your bobbin is the correct way up, if the thread is not firmly held in the tension, the stitch will have a similar effect of being loose underneath.

bobbin 7

bobbin set correctly to go into a front loading bobbin case

bobbin 6

Bobbin set correctly to go into top loading bobbin case

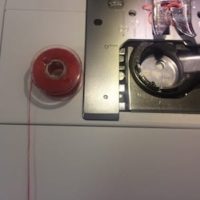
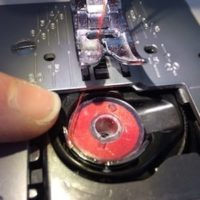
On a top loading bobbin case, you can see if you have the thread through the tension.   Once you have fed the bobbin thread up to the top (using the top thread to pull it through) you will see a line of the bobbin thread running over the top of the bobbin.

If you do not see this line then you have 1 or 2 problems.  1 – your thread is not in the tension properly or 2 – your thread is not in the tension AND your bobbin is upside down.  Double check both to ensure that you get it right the next time.

bobbin 3

visible line of thread in correctly threaded bobbin

bobbin 2
bobbin 1

Unfortunately with a front loading bobbin, you do not have the option of seeing the thread.  However you can check the bobbin before putting it into the machine.  Again, follow the instructions in your manual to get the thread into the tension, and then check by doing the following…

Hold the loose end of the thread.  The bobbin will hang like a yo yo if the thread is through the tension correctly.  You can see the thread coming out of the hole in the side of the bobbin case

See the pictures on the left

I hope that this has helped you to get that bobbin in correctly every time.  Sometimes this is the only thing that is stopping your machine from stitching neatly but unless you are completely aware of what has been going wrong, you think that the machine has a fault.  I have know people to give up sewing completely because of this frustration and banish their machine to the dark depths of the cupboard under the stairs.

Lets get those machines back out there, they love to be busy, and they really don’t mean to give you these sneaky little problems to puzzle you.